Setup guide for pyOVR and the Blender integration
| Authors: | Alexander Demets (2014), Siddhant Shrivastava (2015) |
|---|
Workflow(updated August 2015)
- Download
version 0.5.0.1of the Oculus SDK. The SDK can be found here , and the signature can be found here. - Download Bindings for the Python Language from here
- Setup SDK after following the instructions in the
README.Linuxin the root directory of the SDK. - Plugin the Oculus device (DK1 or DK2). Establish the connections appropriately.
- Start the Oculus VR daemon by running
ovrdin the Linux terminal.ovrdmust run throughout when Oculus is to be used. - Configure and Identify Oculus by running
RiftConfigUtilin another terminal. - Paste the
oculusvrfolder from the Python Bindingspython-ovrsdkfolder ineras/servers/erasvr/. - Use the bindings in Blender Game Engine.
Possible Issues and Troubleshooting (updated August 2015)
Setup guide for pyOVR
Generate libovr.so
Currently the default makescript for the Oculus SDK compiles the whole LibOVR package as a static library. For the ctypes-integration of LibOVR’s C-API in Python, we need it as a dynamic library (shared object). To do this, the original makefile has to be replaced with a custom one.
First download and unzip the OculusSDK v0.3.2 (currently newest available for Linux) from the Oculus Developer Platform. To install all dependencies for compilation of the Oculus SDK, run following commands in the terminal:
tar xvzf ovr_sdk_linux_0.3.2.tar.gz
cd OculusSDK
./sh ConfigurePermissionsAndPackages.sh
And copy the custom makefile from your cloned ERAS repository over to the LibOVR folder, and compile with make:
cp -b path/to/eras/servers/erasvr/pyOVR/Makefile_for_LibOVR/Makefile LibOVR/Makefile
cd LibOVR
make
Note
Carefull! Copy the new Makefile into the LibOVR folder, not the OculusSDK folder. The -b argument for cp makes a backup copy for the original Makefile.
Configure pyOVR
At this point, there should be a libovr.so in the according platform folder of LibOVR/Lib. Of course the Python bindings have to know the location of the libovr.so file. So switch over to the pyOVR folder, and do one of those things:
1st option (Copy libovr.so into pyOVR folder):
cp OculusSDK/LibOVR/Lib/.../libovr.so eras/servers/erasvr/pyOVR/libovr.so
2nd option (Edit path directly in pyOVR/pyOVR.py):
LIBOVR_PATH = path/to/OculusSDK/LibOVR/Lib/.../libovr.so
Run Tests for pyOVR
Now that everything is setup, you can run the test scripts:
python3 pyOVR/Testsimple.py
python3 pyOVR/TestRiftDevice.py
If successfull, you will see the Oculus Rift identified, and its sensor data put out continuously:
user@ubuntu:~/Development/eras/servers/erasvr/pyOVR$ python3 TestSimple.py
OVR::DeviceManagerThread - running (ThreadId=0x7f950163d700).
OVR::DeviceManager - initialized.
*** SensorFusion Startup: TimeSeconds = 1408388773.073210
OVR::Linux::HIDDevice - Opened '/dev/hidraw1'
Manufacturer:'Oculus VR, Inc.'  Product:'Tracker DK' Serial#:'AAAAAAAAAAAA'
OVR::SensorDevice - Closed '/dev/hidraw1'
OVR::Linux::HIDDevice - HID Device Closed '/dev/hidraw1'
OVR::Linux::HIDDevice - HIDShutdown '/dev/hidraw1'
b'Oculus Rift DK1'
OVR::Linux::HIDDevice - Opened '/dev/hidraw1'
Manufacturer:'Oculus VR, Inc.'  Product:'Tracker DK'  Serial#:'AAAAAAAAAAAA'
Sensor created.
+1.00 +0.00 +0.00 +0.00
+1.00 +0.08 -0.00 +0.00
+1.00 +0.08 -0.00 +0.00
+1.00 +0.08 -0.00 +0.00
+1.00 +0.08 -0.00 +0.00
+1.00 +0.08 -0.00 +0.00
+1.00 +0.08 -0.00 +0.00
+1.00 +0.08 -0.00 +0.00
+1.00 +0.08 -0.00 +0.00
Blender Integration
Before attempint the Blender integration you have to make a simbolic link to the directory containing pyOVR from the directory containing the character controller blender file. In the current status of our software archivse this should be something like this: cd <archives root>/v-eras-blender/scenes ln -s ../../eras/servers/erasvr/pyOVR pyOVR
The Blender integration is practically a drop-in character controller for your BGE project. To test it out open the included CharacterControllerOVR.blend file in Blender v2.71+.
Overview of character controller
First of, that’s how the object hierachy ob the character controller looks:
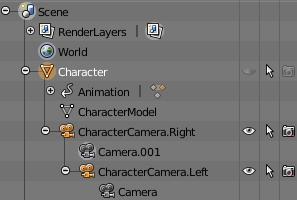
Figure 1: Object Hierarchy for custom character controller.
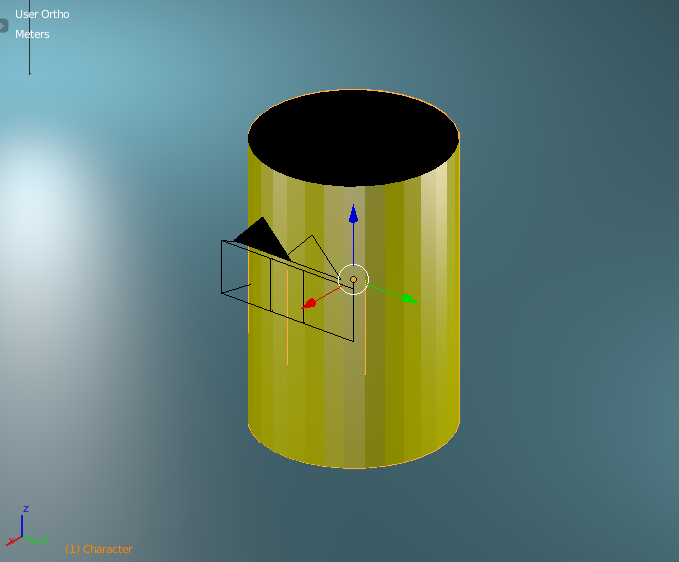
The Character object is our rigidbody, and also defines the outer collision bounds. Its geometry is defined as invisible cylinder, and it’s collision bounds are defined by a capsule (makes movement more fluid).
|
|
|
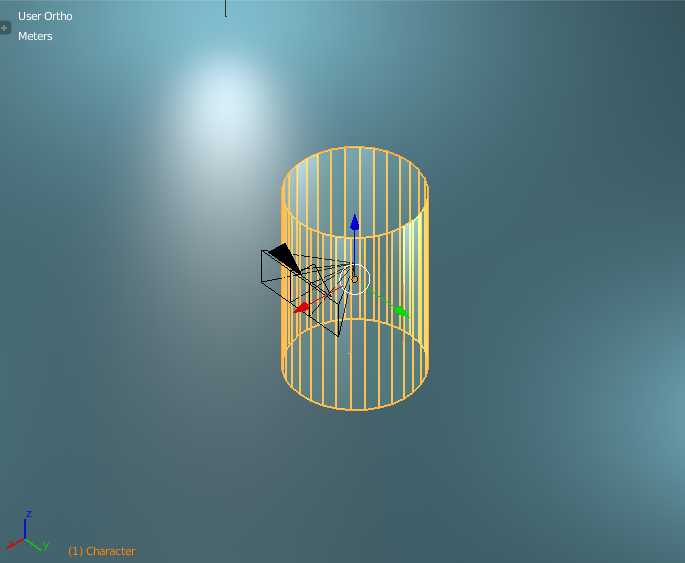
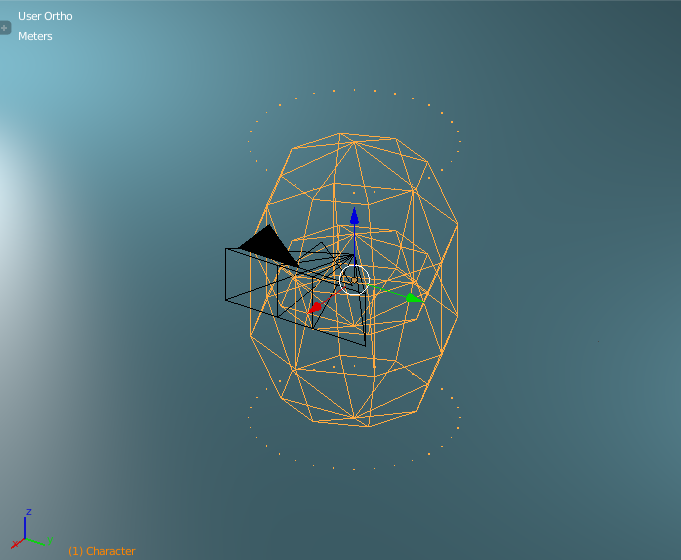
| Fig. 2: Character object, solid outer hulls | Fig. 3: Wireframe of Character object | Fig. 3: Actual collision data used for Character object |
The movement happens, by checking the sensor data (currently Keyboard & Mouse), and applying a force to the rigidbody Character. The scripts and actuators are setup like that:
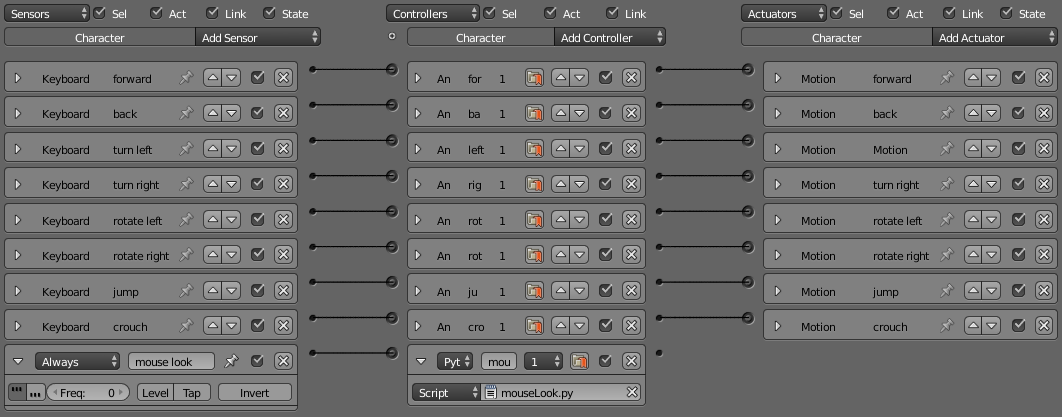
Figure 5: Sensor/Actuator setup for Blender character controller
Looking at the setup the movement is mostly configured through Blender inbuild functions, only exception is the Mouse-look script. What it does is, it takes the relative movement of the Mouse its X-axis and rotates the whole Character rigidbody. This means including the two Camera-childs, which get rotated left/right like a fixed head to a body would do. The Oculus sensor data is then applied to the Camera.right and Camera.left object, by using following setup:
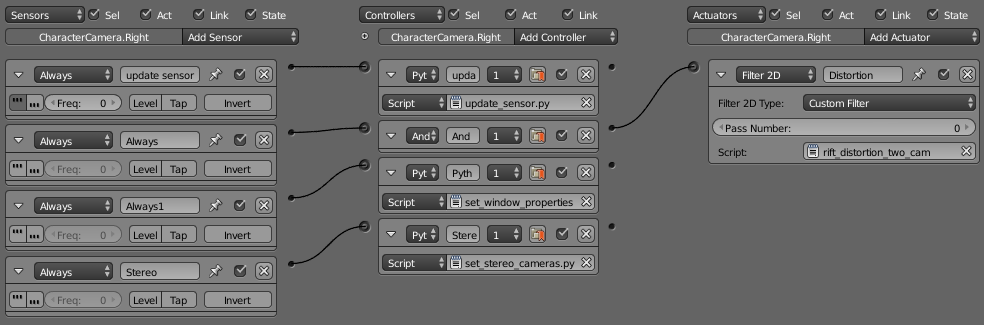
Figure 6: Sensor/Actuator setup for head rotation via sensor data and Barrel rendering.
The update_sensor.py script initializes the Rift and applies the sensor data to the camera objects. The Filter2D post-process applies the barrel distortion to the resulting image.
Integration in own Blender scene
Integration of the character controller into a custom scene is very easy, just open your scene and go to:
File > Link/Append > CharacterController.blend > choose "Character"
This will either link or append the character controller into your Blender scene.
Render settings in Blender
These settings give good results, but can be modified as needed:
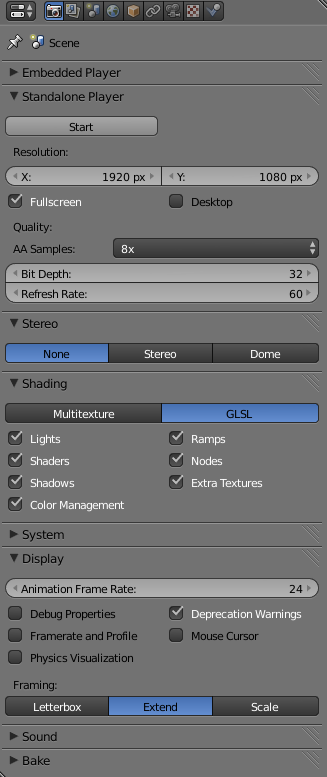
Figure 7: Render settings for Blender scene.
Applicable Documents
- [1] – Oculus Developer Platform
- [2] – Oculus SDK Overview v0.3.2
- [3] – Blender Python API